8 Tips for Displaying Historic Clothing at Home
For private collectors, historic garments are not just beautiful objects — they’re tangible connections to the past. Displaying them at home allows you to share their stories with visitors and enjoy them yourself. But unlike modern clothing, historic textiles can be fragile and vulnerable to damage if displayed without care. Here are 8 tips for displaying historic clothing at home, adapted from museum-standard techniques, to help you exhibit your collection safely.
1. Handle With Care
The single most important principle in working with historic garments is minimal handling. Every time a textile is touched, there’s a small risk of damage — so plan before you move it.
Preparation tips:
- Remove rings, watches, and jewelry that could snag fabrics.
- Wear nitrile or cotton gloves when handling garments. This is to reduce the transfer of oils on the hands and fingers which can discolor the fabrics. Nitrile gloves are the preferred glove as they allow for more tactile control when handling clothing.
- Use support materials such as acid-free tissue paper or polyethylene foam when lifting or storing garments.
2. Assess Before You Display
Before you mount any piece, inspect its condition. Look for signs of:
- Weak seams
- Tears, holes, or splits in the fabric
- Insect damage (e.g., moth or carpet beetle frass)
- Stains, mold, or other deterioration
If the garment is extremely fragile or damaged, it may need conservation work before it’s safe to display. When in doubt, consult a professional textile conservator. This is a big one. If the garment is damaged to the point that displaying it will cause it more damage—then you definitely want to contact a conservator to have it repaired first.
3. Choosing the Right Support
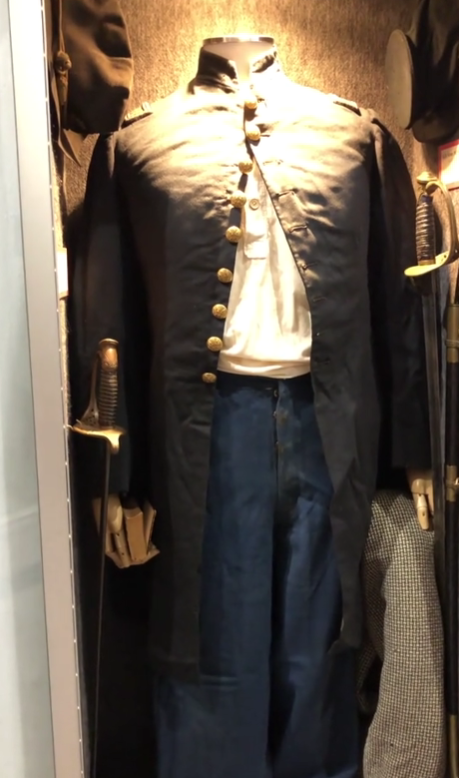
Mannequins and Dress Stands
If you are displaying a uniform piece such as a jacket, coat, shirt, or even a civilian woman’s dress, you’ll want to use a mannequin or some kind of dress form ideally. The reason for this being, that a mannequin will fill out the uniform and allow it to sit properly. For example, think about when you wear a coat. The weight falls on your shoulders across your back and is distributed along the width of your shoulders. Now, when you take it off and put it on a hanger, all that weight is distributed across the thin metal or plastic bar of the hangar. This puts all the weight on a very thin bar which, over time, damages the coat. This is why you’ll often see thicker wooden hangars for coats, or padded hangars for delicate women’s garments.
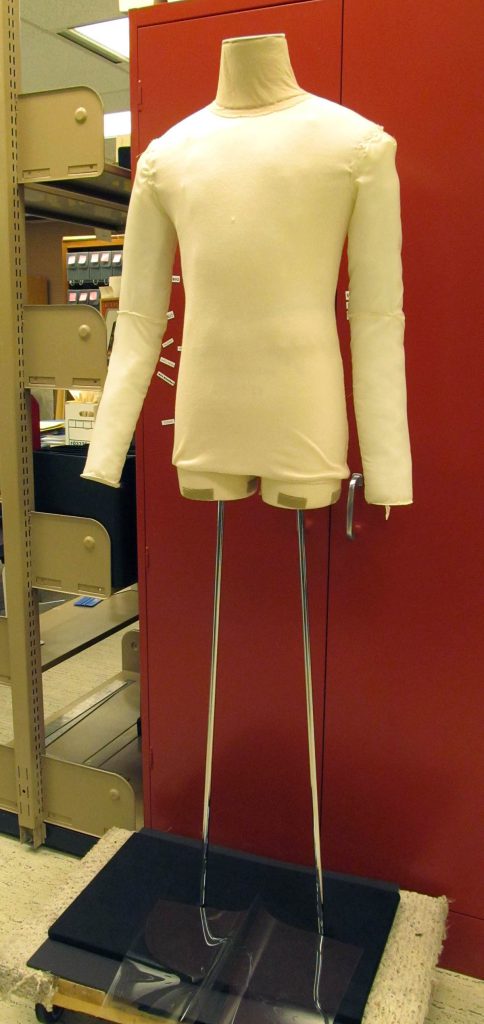
- For display, your choice of figure is crucial. The mannequin should be smaller than the garment so that it can be padded out to fit. This avoids stretching or stressing the fabric as discussed above, and padding the mannequin ensures that the clothing is resting on as much support as possible.
- Mannequins are available in all sorts of shapes and sizes. Make sure to look for museum quality and archival ones.
- Custom mannequins are ideal but can be expensive. If you have a large budget to play with in your home exhibit, this is definitely an option, but it is not necessary.
4. Padding to Fit
Historic women’s clothing was designed for very different body shapes than modern ones. A modern woman’s mannequin almost never fits perfectly without modification. Padding creates both support and authentic silhouette. And, in most exhibits I’ve worked on, we’ve actually used child-sized mannequins to display vintage women’s clothing. This occasionally is an issue with men’s clothing as well, as folks were just generally smaller in those days.
- Padding will help ensure that the garment rests solidly on the mannequin without causing undue stress on the seams.
- Build shape with polyester wadding, working in layers and feathering edges to avoid sharp lines.
- Women’s clothing will likely need additional padding. Focus padding where historic undergarments would have shaped the body (e.g., bust and hips for 19th century corsets).
- Cover the padded mannequin with washed stretch cotton jersey to protect the garment and keep the padding in place. Once it is covered, you can place the original garment onto the mannequin. It should fit as if it was made to fit the form you just created. It should not be snug and tight, nor should it be too loose.
5. Positioning and Safety at Home
Museum conditions are hard to replicate exactly, but you can still take steps to protect your collection.
- Avoid direct sunlight and strong artificial light. UV causes fading and fiber breakdown. Please do not set up that super cool Civil War infantry major’s uniform in front of your bay window, or in a basement that is lit with fluorescent lights. You can purchase UV film rather inexpensively to take care of UV light coming from windows and artificial lights.
- Maintain a stable environment — avoid damp basements, attics with extreme temperatures, or areas near heat sources. Air vents, drafty windows, and humid environments are all bad for collections.
- Keep displays away from kitchens or open windows where pollutants and dust are common.
- Ensure the garment is secure on its mount so it won’t shift or slip if the display is bumped. This should not be a problem if it fits properly on the mount you created.
- If at all possible, place the mannequin and historic garment inside an exhibit case. This will go a long way in keeping dust and pollutants off of it, and make it more difficult for moths to get at them. It also offers some minimal protection from water and smoke damage.
6. Tools and Materials for Home Collectors
Even without museum facilities, you can use many conservation-grade materials:
- Acid-free tissue paper for padding folds and delicate areas
- Tyvek® for dust covers
- Ethafoam for padding or lining display supports
- Nitrile or cotton gloves for handling
Many of these can be purchased in small quantities from preservation suppliers such as Gaylord or University Products.
7. The Display Experience
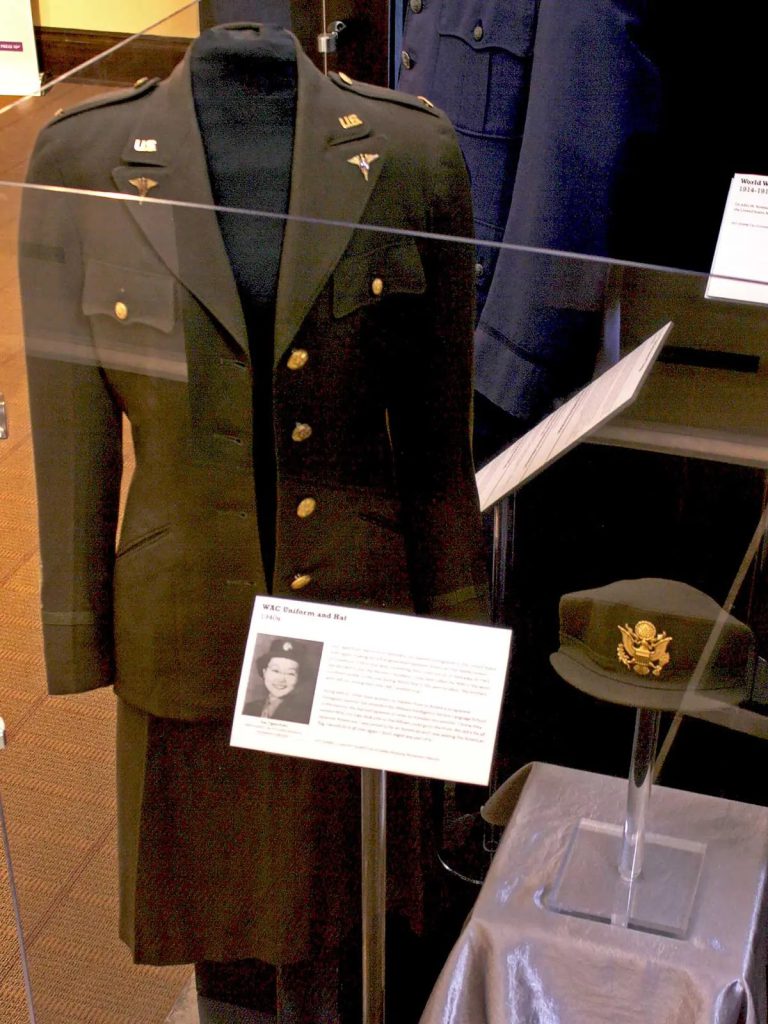
Once your garment is safely mounted and positioned, consider the storytelling aspect. A simple card or frame with the garment’s history — who wore it, when, and for what occasion — turns your display into a conversation piece.
For added impact:
- Use neutral backgrounds so the garment’s colors and textures stand out.
- Employ soft, diffuse UV free lighting to avoid harsh shadows or fading.
- Position garments at a comfortable viewing height.
- Include information about the garment so that visitors can understand its historical value.
- Don’t clutter the case or area around it with a bunch of signage or other artifacts. That detracts from the overall display itself.
8. Rest Your Garments
Please consider rotating pieces to limit their exposure to light and environmental stress. Even if you follow instructions to the T when exhibiting your items, having them on display causes them damage. There is no way around that. Limiting the time they spend on display by rotating them out with other garments still allows you to have an exhibit up, while also caring for your collection. When not on display, store them flat in acid-free boxes or on padded hangers in breathable garment bags.
Final Thoughts
Displaying historic clothing at home is a balancing act between preservation and enjoyment. By borrowing a few key practices from museum professionals — careful handling, custom-fit mounts, and safe environmental conditions — you can create stunning displays that protect your treasures for years to come.
Your collection is a bridge between past and present. With the right care, each garment can tell its story vividly while staying safe from harm. Check out our other archival and preservation tips here.
