4 Benefits of a Digitized Collection

4 Benefits of a Digitized Collection

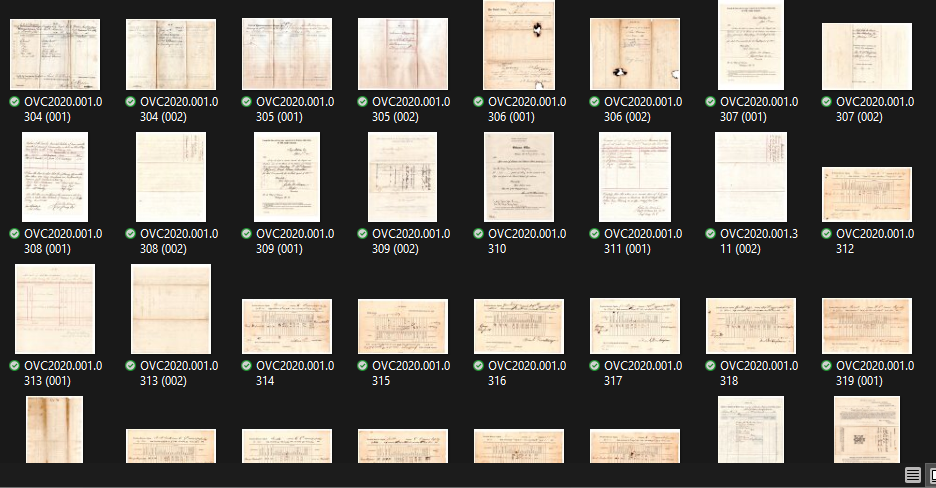
Last week, we went over some tips for scanning your collection. So, you’ve gotten a scanner and digitized your Civil War era photographs, letters, and documents. Now what? There are multiple ways to make use of your digital collection, but how far you decide to take is entirely up to you. Here are 4 benefits of a digitized collection.

1. Insurance

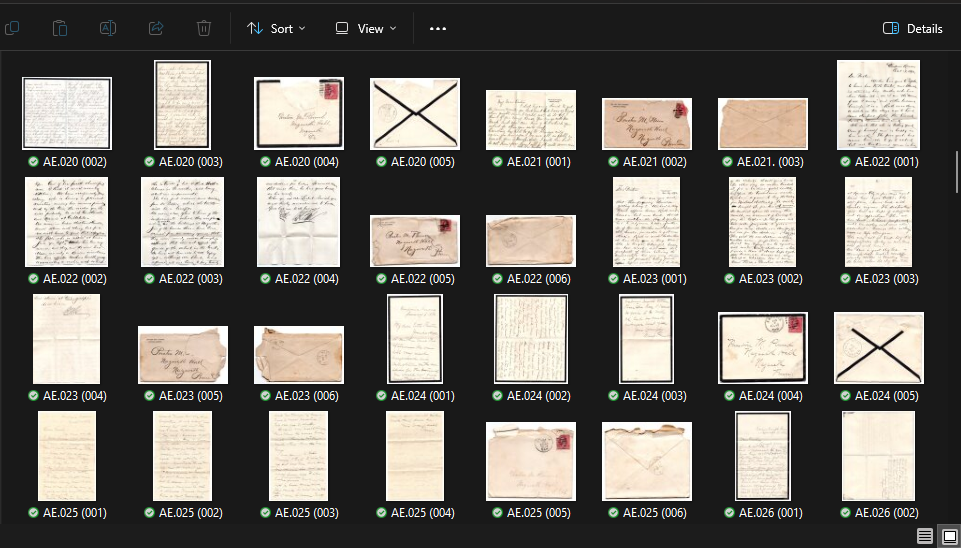
This is something I would highly recommend for every collector, and I’ve already harped on it in past blog posts, but please consider insuring your collection with a special policy. Many, if not most, home insurance policies will require “collectibles” to be itemized and covered separately. Having your collection digitized makes it much easier to have it appraised and submitted to your insurance company. The scans also provide a record of what you specifically have in your collection should any claims arise—but hopefully they never do!

2. Originals Safely Stored

Having your collection digitized means that you can safely store fragile elements of your collection. I understand that this is not practical for many collectors as they like to see their collection on display, but for some pieces, that may not be advisable. For instance, I have a beautiful official U.S. Senate portrait with its original frame from about 1885 or so. I removed the image from the frame, scanned it, and have it stored safely in my archive. I ordered a copy of the photograph and placed that inside the frame with a new archival quality mat, as the original was acidic and crumbling. That framed photograph now hangs on my wall at home, but the original is safely tucked away with no fear of fading or other damage. And I get the pleasure of having the original frame on display without worrying about it damaging the period photograph.

3. Virtual Exhibits

Here's an example of CatalogIt's online HUB virtual exhibit as used by the Chattanooga Historical Society.
Here’s an example of CatalogIt’s online HUB virtual exhibit as used by the Chattanooga Historical Society.

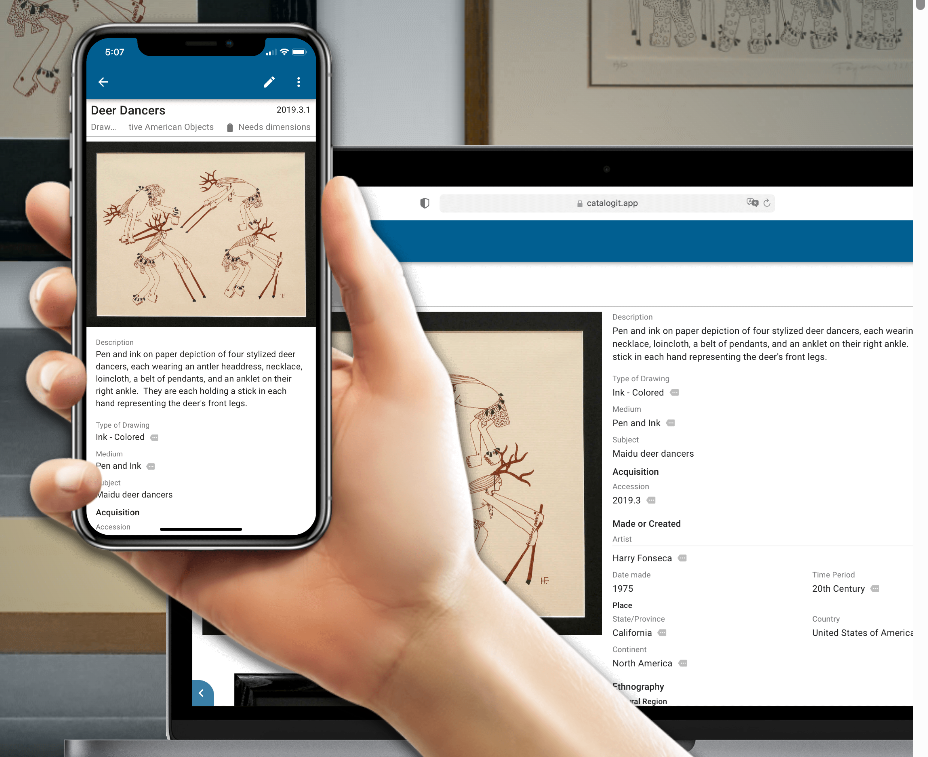
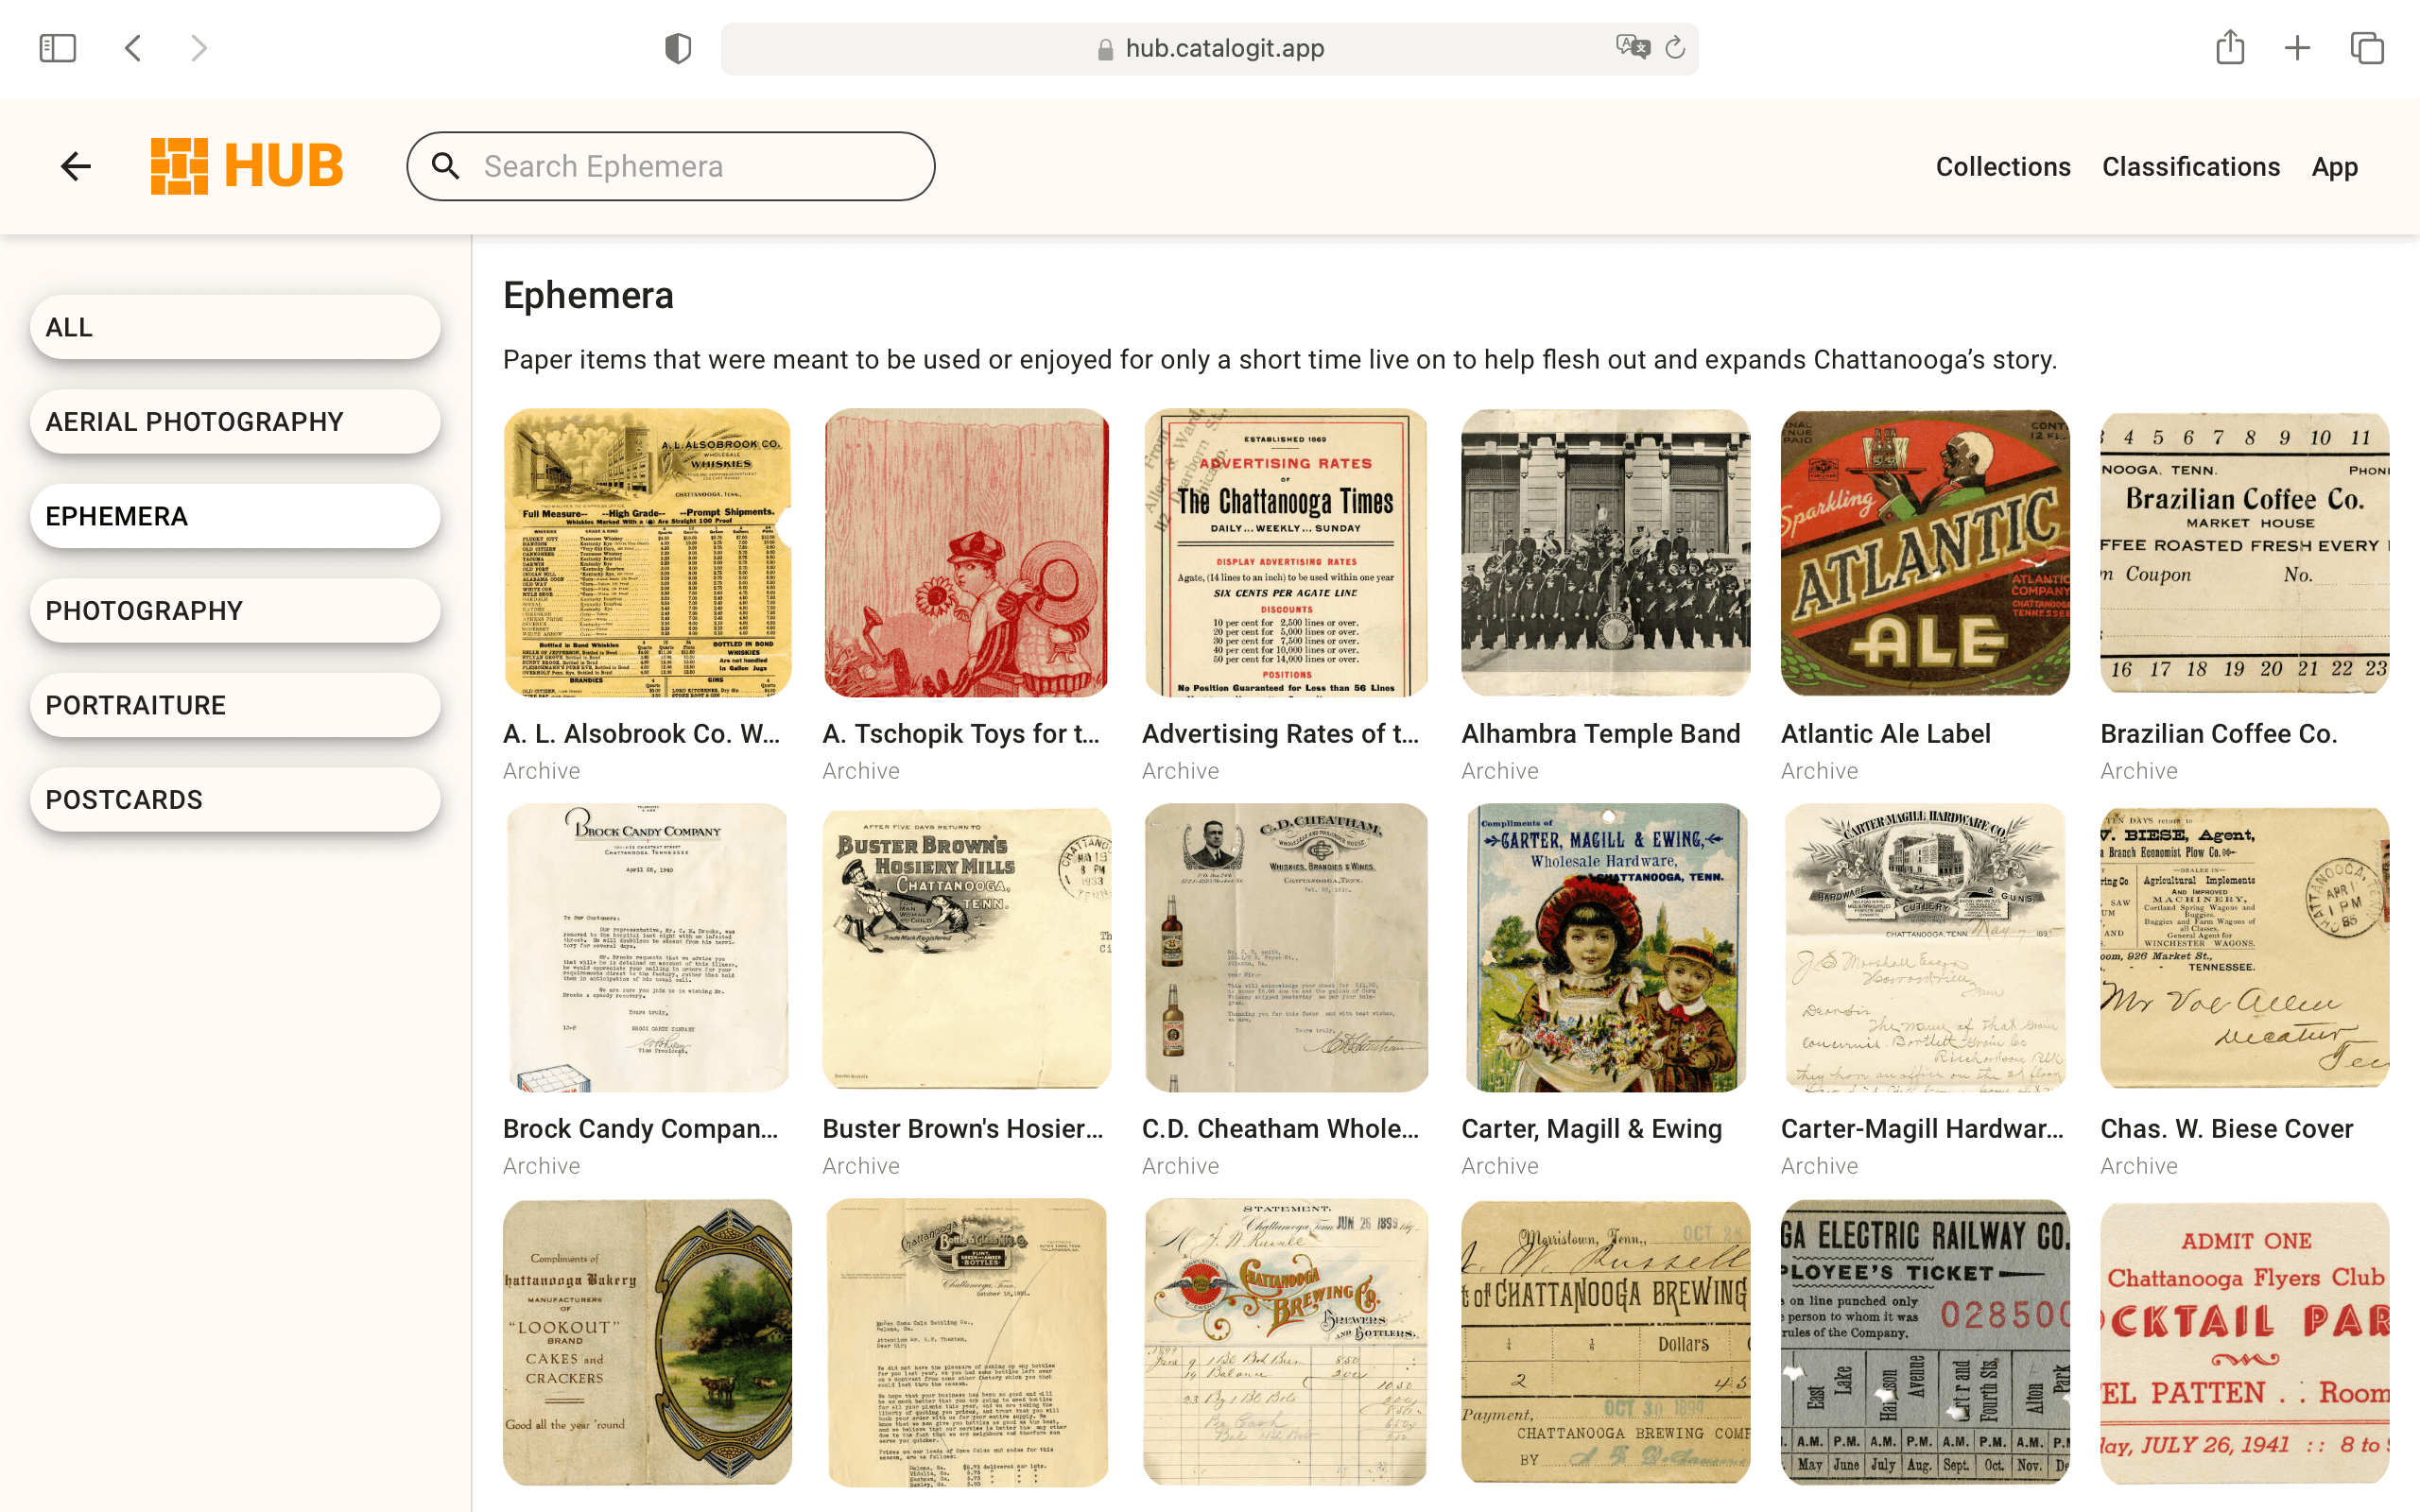
This is something that can be a bit of work, but the payoff can be immense. Depending upon your collection and the size of it, curating a virtual exhibit of it can be a fantastic way to share the knowledge you’ve accumulated while gathering your collection. It can also help connect you with other collectors and researchers knowledgeable in your area of interest. To a certain extent, any time you share a post on Facebook or Instagram about an item in your collection, you are creating a virtual exhibit of a single item. However, there is software available to make collections more accessible. Whether you are using a simple WordPress site or using collection management software like CatalogIt or PastPerfect, sharing your collection with others can lead to new information, and possibly new acquisitions.

4. Sharing with Museums

This can be a bit of a sticking point with some collectors as they tend to gather things into their collections, shout “MINE!”, and then proceed to make sure that nothing in their collection ever sees the light of day. As a researcher, I have encountered this, and as a researcher, I tend to make available things that I have because I know what it’s like when you’re writing a book on something and you can’t get that last bit of information because someone has it squirreled away somewhere.

To give you an example, I have been involved with the Fort Caspar Museum in Casper, Wyoming for over a decade and the museum has been around since the 1930s. The city of Casper is named after the fort, which was named after young Lt. Caspar W. Collins of the 11th Ohio Volunteer Cavalry killed in battle here on July 26, 1865. We do not have a single adult photograph of Caspar Collins. We have one photograph of him as a toddler, and that’s it. Now, he spent much of his service with his father, Col. William O. Collins, and I think it is safe to assume that he likely had his photograph taken at some point in his service, and likely one with his father. I also think it is reasonable to assume that that photograph is sitting somewhere in someone’s collection or collecting dust in an attic. That collector may have no idea we’re looking for that photograph, and likewise, he has no idea that he’s sitting on some unidentified 11th Ohio Volunteer Cavalry trooper photograph that we could likely identify. Unless that information makes it online somewhere, we are unlikely to ever cross paths so we will continue to hope and wait that a Caspar Collins photo pops up on the internet, and that collector will continue to own that photo without realizing who it is.

I’ve also tried to track down photographs of Civil War soldiers killed while in service out here who are being honored with headstones. I’ve added 22 headstones over the last few years and only have 2 photographs. I’m sure that there are more out there—especially of the officers—but they are likely not identified, or housed in a collection with someone who hasn’t seen my Facebook posts looking for them, or worse, isn’t even aware that they have those photographs. Some collections become so large and unmanageable that it is next to impossible to keep track of everything. As collectors age and pass away, that knowledge goes with them and the collections are liquidated reducing identified soldiers to now unknowns.

The point of this larger entry is to encourage collectors to share what they have. If not literally copies of scans, to at least make themselves known to local institutions. So when a museum in Wyoming reaches out to a museum in Ohio looking for a Caspar Collins photograph, the curator in Ohio could pass our query on to someone who might possibly be able to help. Otherwise, it’s like playing a decades-long game of “Go Fish” calling and trying to find these sorts of things. Not only would you be helping these institutions, but they may also have information and items in their collections that could help you learn more about what you have and provide more context for you.

From preservation, to ease of access, to virtual exhibits, having a digital copy of your collection is priceless. I hope it’s not something that ever has to be used in the case of an insurance claim, but it will be extremely important to have in that type of event. If there is interest in how to set up a virtual exhibit, I can share some information on that topic in future posts. Just leave a comment or message us on Facebook!

How to Scan Your Collection

How to Scan Your Collection

This is only a basic guide on how to scan your collection. For this purpose, I’m focusing on documents and photographs. Things like maps, glass negatives, slides, etc. can be more complex and would far exceed the space I have here. But I wanted to create a basic guide with some pointers that might be helpful and I wanted to discuss file formats which is not something often covered in scanning guides.

Last week I went over some different types of scanners that can be useful for scanning documents. Both flatbeds and the CZUR overhead scanner were mentioned, but today I’m focusing on using a flatbed scanner.

Scanning Procedure for Documents

No matter which brand or size of flatbed scanner you are using, these tips will apply. The first is to make sure you have a clean glass scanning bed. It is extremely frustrating to scan a bunch of materials and then discover that there was a dirt smudge or a stray hair on the glass that is now on all of your scans! I would recommend some type of microfiber cloth or a screen cleaning cloth used for computers or phones to wipe down the scanning bed periodically. You will especially want to do this if you are working with old paper that is crumbling or dusty because each time you place a new sheet of paper on there it will probably leave some sort of dust or residue behind.

The next step is to place your document on the flatbed, close the lid, and go into your scanning software. You’ll want to make sure that it’s set to “Document” or some equivalent of that. And then you’ll want to adjust your resolution and file types. For documents, I recommend scanning at 300 dpi. You are welcome to scan at a higher resolution, but I would not scan at any less than 300 dpi. For file types, I recommend TIF files as they are uncompressed, but with document scans you may determine that you do not need such large files and go with JPGs. Still, with the low cost of purchasing external hard drives and cloud backups these days, I would recommend going with a TIF format just to maximize the quality of data you are getting in those scans.

Both of my Epson scanners have an “Auto” or “Manual” scan mode and I keep mine set on “Manual.” I’ll click “Preview” and that will make it scan the entire surface of the glass. Once I have that preview image, I’ll draw a box around what I specifically want to scan and then click scan. The “Auto” setting means you can just click scan and it will auto-detect the edges of the paper and crop your scan accordingly. However, I’ve found that lots of times it has trouble determining the edges of the paper, especially if it is very white (blends in with the cover background) or if it is torn. In order to avoid rescanning overly cropped images, I just prefer to manually set those boundaries myself.

Here you can see the file name format used by the Research Arsenal and how multiple scans of the same document are given parenthetical numbers.

Once the image is scanned in the folder of your choice, you will need to give it some sort of file name. This is where I will chime in again about the importance and convenience of using catalog numbers. You can name your files with those and if you have more than one scan per file number it simply becomes 001, 002, etc. So, it would look something like OVC2020.001.003 (001) followed by OVC2020.001.003 (002), and so on. This way they are all kept together and in your collection software or Excel sheet you have the description of the item connected to that catalog number.

Scanning Procedure for Photographs

To scan photographs, you would follow the same process as above, except with regards to resolution. For images, I would recommend that you scan them at 600 dpi at a minimum. Some scanners will go all the way up to 4800 dpi and other insanely high numbers, but it is not necessary to scan prints at that resolution. I have scanned many at 1200 dpi because I wanted to make sure I got the most information possible out of the scan, but when you’re working with prints, eventually you get to the point where you’re squeezing blood from a turnip. A print only has so much information on it, and once you’ve crossed into 1200 dpi or higher, you have reached into territory where there is just not any more information to be gleaned from it in a scan.

Like the documents, I highly recommend saving images as TIF files. You are far more likely to want to zoom in on an image than a typed letter and saving the file as a TIF gives you greater ability to do so. There is no point in scanning an image at 1200 dpi for high resolution and then compressing it by saving it as a JPG.

TIF Vs. JPG

In case anyone is wondering why I am harping on file formats, this why. Whenever you save in one of these formats, your file is compressed. Meaning it’s squeezed into this type of file format. JPG uses a “lossy” compression meaning that it essentially deletes bits of the data you just created in your scan in order to save it in a smaller file size. A TIF on the other hand, does NOT use “lossy compression” which results in a larger file size, but all of your information remains intact.

A JPG can be handy if you’re uploading these to the web or emailing them or posting them on Facebook. But you can always work down in file size from something larger, you can’t work your way back up from something small. For this reason, I recommend saving all your scans as TIF files and then simply making a copy of the file as a JPG if you’d like to upload it online or email it to someone. That way you still retain a high-quality version of it.

I use CatalogIt for my collection of archival materials and I make a JPG copy of my scans and upload the JPG copy to their database so that it does not take up as much room since storage is a factor with their software. I keep the larger TIF files on my computer and back up separately to the cloud.

I hope this is a handy reference and helps answer some questions about resolutions and file types when scanning documents and photographs. Have more questions about any of this? Let us know on Facebook!

The Scanners to Digitize Your Collection

The Scanners to Digitize Your Collection

Last week we discussed in some basic detail the advantages of having a digitized copy of your collection available. This week, I want to tackle the first basic step in digitizing your collection—the scanners to digitize your collection. Each one of these sub-headings could be an entire post in itself, but I wanted to give you some basic information to get started if this is not something you have done before and you need to purchase equipment. I was going to go right into how to scan things, but I figured I’d better back up and start with having the best tools in place first.

In order to digitize your collection you will need a scanner, and a flatbed scanner would likely be your best option. You will get the best scans possible from a flatbed scanner as opposed to overhead scanners (but they are extremely useful as I’ll point out later on), and document feeders. I include document feeders on here because there are oversized scanners that use a document feeder to scan large maps and other oversized documents.

Flatbed Scanner

There are lots and lots of different brands and types of flatbed scanners available for purchase. Here, I’m going to share recommendations based on scanners that I personally use. You may already have one that has these same features, in which case, that is perfectly alright. These are by no means the only scanners that can do the job, these are just ones that I am currently using.

Epson Perfection V39 II

This is one of the more affordable scanners to digitize your collection, and it is very portable too.
This Epson Perfection V39 II scanner one of the more affordable scanners to digitize your collection, and it is very portable too.

My version is the I rather than the II, but for all intents and purposes, they are the same. This scanner was a lifesaver for me as a researcher who spent several weeks on the road and needed to digitize photographs for research and eventual book publication. This little 3-pound scanner is small enough to fit into the laptop section of a standard backpack, but can scan at resolutions up to 4800 dpi. For reference, when scanning you’ll want to use a resolution of 600 dpi. Anything beyond that inflates the file size and typically does not add much to quality except in some circumstances.

This scanner runs off the USB connection to your computer, so there’s no need to find an outlet and deal with a separate power cable. This can be really handy if you’re running short on outlets at home, or you’re scanning someplace and don’t have one nearby.

The downside is that you are limited to 8.5” x 11” in scanning area, which is not enough if you have large letters or other documents. However, if your collection is only tintypes or other smaller media, then this little scanner that runs around $130 will do just fine.

Epson DS-50000

The Epson DS-50000 scanner is a pretty hefty scanner and much more expensive than other options. However, it is fairly quick, offers great resolution, and is a good workhorse if you have a lot of material to scan and you want it scanned in good resolution.

This scanner is most definitely not a portable scanner. It is parked in my office and has a much larger scanning surface than the Epson V39. The Epson DS-50000 can scan documents up to 11”x17” in size which is extremely handy when you are processing a lot of material that runs larger than 8.5”x11.” It can scan in resolutions up to 9600 dpi, which again, is extremely high. This scanner is a hefty 32 pounds, which means it’s not something that you want to be setting up and tearing down over and over. It will need a place to live in your office area. It also has a hefty price tag of a little over $1,800 so it is a big investment.

Overhead Scanner

In a way, the term “overhead scanner” is a bit misleading, as these scanners are actually taking photographs rather than “scanning” as a flatbed scanner does. Regardless of how it works, these scanners are a godsend if you are trying to scan a lot of material in a short amount of time. I mentioned earlier that the Epson V39 was extremely helpful for scanning images on the road, these CZUR scanners were crucial for scanning thousands of pages of documents in a very short period of time. You will not get the clarity you would with the Epson DS-50000 on the documents, but depending on your needs, that may not be necessary.

CZUR Aura Mate Pro

The CZUR brand of scanners are probably the most efficient scanners to digitize your collection on the market. They are reasonably priced, easy to use, and scan quickly--2 seconds per image! These work well for archival materials, but not for photographs.
The CZUR brand of scanners are probably the most efficient scanners to digitize your collection on the market. They are reasonably priced, easy to use, and scan quickly–2 seconds per image! These work well for archival materials, but not for photographs.

You simply set up the scanner and the associated scanning pad, hook it up to your computer and you’re ready to go. You can place a single sheet of paper on it—crooked even—and it with the click of a mouse or a press of the foot pedal, it takes a photo, and it’s done. As quickly as you can read, place the paper, click the mouse, place the paper, click the mouse, etc., it’s taking photos. It automatically straightens and crops the images to the edges of the paper, so you don’t have to take time lining them up. If you’re scanning a book, you simply lay the book down, take a picture, turn the page, take a picture, turn the page, etc. You can digitize an entire book in minutes. Now, I will also say that if you’re using this to digitize period books like diaries and such, it gets a little more complicated, but for the most part, it really is this fast. Their product spec page lists the scanning time at 2 seconds per page. It also has a feature for books to correct the curvature in the pages due to the binding so that you end up with two flat pages once it has processed them.

On my last research trip, I brought the CZUR Aura Mate Pro with me as it folds down and is a bit easier to travel with than some of their other models. This model is still available along with a number of other models made by the same company. I will mention that my scanner is bubblegum pink, and it doesn’t appear that you can still get it in that color. Sorry. 😊

This scanner is great for document material; it is not great for photographs. With documents, it has clear resolution, and easy to read, and that’s largely because documents do not have the level of detail and color depth that photographs do. If you try to scan a photograph with this scanner it’s like taking a picture of a picture, and you lose a lot of detail and color. I recommend sticking with flatbed scanners for images and using the CZUR scanner for documents. It is also very affordable at $289 with other models being more expensive.

Document Feeder Scanners

First off, I would like to just say, don’t. Just don’t. If you happen to have an all-in-one printer, scanner, copier that has a document feeder, do not run Civil War letters or other historic documents through them. Period documents are far too fragile to go through something like that. They are likely to get caught in the feeder mechanism and shredded, so it’s best not to.

That being said, there are companies who have large document feeder scanners with specialized equipment to handle fragile documents. If you have large muster rolls or other oversized documents, finding a local company with those materials may be an option. But please do your research and make sure that they can safely handle historic materials.

Why Digitize Your Collection

One of the things I’ve written about in previous posts is the importance of digitizing your collection. Whether it’s a photograph collection, or document collection, it’s important to have a digital version of it. Here I’m going to outline why digitization is important and in future posts we’ll go over how to do that and what to do with that digital collection once you have it.

Why Digitize Your Collection

Why digitize your collection? Here's one answer: all of your important documents scanned and cataloged so that any of them can be brought up with just a few clicks.
Why digitize your collection? Here’s one answer: all of your important documents scanned and cataloged so that any of them can be brought up with just a few clicks.

This is probably the biggest question and the most important one to answer first. One of the biggest reasons to digitize your collection is to have a digital record of it, which is useful in a variety of ways: Keeping track of what you own (catalog), insurance purposes, easy reference (where is that tintype again?), research (how nice is it to zoom in on photos?), and preservation. I am harping on this topic because I have run across too many collections and even personal family photos that have never been digitized, and this day and age, it is important to do that.

Keeping Track of What you Own

CatalogIt mobile and web view
CatalogIt offers both a fully functional web-based and mobile-based app, meaning you can view and edit your collection information from anywhere.

This is a big reason for the collectors out there. How many of you have wandered through a show and saw a photo and wondered if you already had that one, already had one from that regiment, or thought maybe you recognized the individual, but couldn’t identify them? How nice would it be to have that information with you at all times! This is entirely doable with the catalog software currently available for museums and collectors.

I’ve recommended CatalogIt in past posts on the importance of cataloging your collection, but here I want to emphasize the fact that because it is cloud based and has a companion phone app, meaning you have your collection with you on your phone at all times. Now, I would recommend creating substantive catalog entries, but if you create even just the most basic entries with attached photos, you will at least have a visual record of your collection. If you add more information like photographers, subject names, regiments, etc., then you will have an even more powerful tool with you when you go to those shows. This software will also track what you pay for items in your collection, so if you want to know if a particular photo is a good deal or overpriced based on what you’ve paid in the past, you have all that information too.

Insurance Purposes

This is a topic no one wants to think about, but it’s a necessary one. If you have a large collection of historical memorabilia, it’s a good idea to have it insured. And to do that you’ll want a good digital record of it backed up somewhere in case the worst should happen and you have to file a claim. It’s a dire motivation to be sure, but something important to consider.

Easy Reference

This dovetails nicely with using catalog software, but if you even just have digital image files on your computer, you can organize them by type, subject, photographer, etc. Once you have them organized it can make it much easier to find the item you’re looking for so that you do not have to go through your collection digging for them.

Easy Research

This ties in nicely with the previous reason because once you’ve found that particular image now you can look at it easily on your computer. You can zoom in and read writing that is too small, see minute details in photographs, and spot equipment, recognize faces, etc. All because photographs are much easier to see on a computer when properly scanned than from a print.

This is also helpful with documents. I have mentioned a couple times in past blog posts the Civil War letters I’ve found that have been traced in ballpoint pen. If you have a letter that is difficult to read you can scan it, and adjust the contrast, levels, etc. digitally until you can read. No ballpoint pens necessary! Seriously though, please don’t use the ballpoint pens…

Preservation

This is the last “why” of this post but certainly not the least. As museums or collectors, historic preservation is one of our most important—if not the most important—thing that we do. If we don’t have the budget to create a nice flashy exhibit, let us at least make sure that items are not degrading in our care.

Every time an item is handled it breaks down. No matter how careful you are or how gentle you are with it, it breaks down. We’ve all encountered those old books and newspapers that seem to just crumble as you look at them. Sometimes it’s not even about how gingerly it’s handled, it’s just the fact that the item in question is so old and so fragile that it cannot be helped. This is why digitizing your collection so that it does not have to be handled is so important.

If you want to look at a specific photograph or read through an old letter again, you can look at the digital version knowing that the original is safely tucked away in archival materials. This ties into that responsibility we have as collectors to make sure that we are good stewards of this history—while we have it. If we do our jobs right, these items will outlive us all and be around for generations to come.

In the next post I’ll go over some digitization tips that may be of help to you if you decide to take the plunge and start scanning your collection. Or, if you decide to punch up your current digital collection with additional scans or cataloging.

2 Methods for Digitizing Glass Negatives

Two Methods for Digitizing Glass Negatives

Digitizing glass negatives is a fairly simple process, and I will offer two methods you may find useful in this post. Last week, I talked about how to store glass negatives and gave some suggestions as to where to find the proper archival boxes specifically made for that. Once you’ve got the right storage materials, you can sit down and start digitizing. It is always important to have proper storage first so that artifacts are safe as soon as possible. Digitizing can be a project depending on how many glass negatives you have, and you may need to spread out the process over a few days.

First Method: Scanning

If you have a home scanner with a “transparency” setting, you may have very good luck scanning your negatives. If your scanner does not have a “transparency” setting, you may be able to scan some negatives, but if they are dark, they scans will likely not pick up the image very well.

To scan a glass negative, put on latex or nitrile gloves, and make sure the glass bed of the scanner is free of any dust or lint. Then make sure that the negative itself is free of dust and hair—you can use a blower to do that without harming the emulsion. Be VERY careful when brushing off debris on the emulsion side. The emulsion can rub off, which is why it is best not to brush that side. An archival dust blower is perfect for getting dust off without ever touching the glass and can be used on other items in your collection as well.

Once the scanner and glass negative are ready, place the negative emulsion side down onto the glass. Now, and important note here, is depending on your scanner’s point of focus, the image may be clearer with the emulsion side up—however, that runs the risk of creating distortion “rings” in the scan. You may need to try a negative both ways to see which turns out the best with your scanner.

Once the negative is on the glass, gently close the lid and take a look at your scanner settings. It is best to scan images at 600 dpi, although if you want to scan them higher, you certainly can. The best file format to save in is a TIF so that as much detail as possible is saved. This creates a much larger file size, but it also provides the richest data file. A JPG or PNG will compress the image, making a smaller file size, but also saving less information.

Second Method: Photographing with a Lightbox

This method is somewhat “old-fashioned”, but it will work well for glass negatives—especially if your scanner does not have a “transparency” option for scanning darker negatives.

Here you can see a glass negative sitting on the right kind of lightbox. This one courtesy of the now extinct photo lab I used to work for...
Here you can see a glass negative sitting on the right kind of lightbox. This one courtesy of the now extinct photo lab I used to work for…
Here is that same glass negative on one of the modern LED light tablets. Notice the black dots all over on the screen. As you can see, these cheaper alternatives are NOT usable for photographing glass negatives!

The first steps are the same as with the scanner—make sure your lightbox and negative are free from dirt and debris, and make sure you are wearing latex or nitrile gloves. Then place the negative on the lightbox and photograph it. One important note here is to be careful of the lightbox you are using. I used a large lightbox that I saved from the old photo lab I worked at that shut down almost 20 years ago. It still works like a champ! But there are new LED ones available online that when they light up, actually create a dot matrix pattern. You do not want one of those LED ones because the black dots will show up in your photograph of the negative.

In this example I used both my cell phone and a Canon EOS Rebel camera to photograph the negative. The cell phone picture came out rather well, although it is in the JPG format. The camera also did very well, but it takes some practice to make sure that you photograph the image squarely from the top looking directly down so that you don’t end up with a slightly distorted picture.

Processing Your Picture

Once you've scanned or photographed your negative, you will end up with a negative image similar to this. It will need to be processed in a photo editing program so that you can see the image properly.
Once you’ve scanned or photographed your negative, you will end up with a negative image similar to this. It will need to be processed in a photo editing program so that you can see the image properly. This particular image was taken with my cell phone while the negative was sitting on the lightbox.

Once you have your digital file of the glass negative—whether from scanning or photographing—you’ll need to process it in some kind of photo software. You can use Adobe Photoshop, or any other myriad of photo editing programs to do the basics of what we need to do here. I use Affinity Photo for these types of edits.

Open the file in your photo editing program of choice, and then add a layer, and select “Invert.” This will invert black into white and white into black so that you have a positive image, rather than a negative. Once you do this, you will likely need to edit some of the black and white levels. This can be done by adding another adjustment layer and selecting “levels.” By adjusting the black and white levels on the histogram that pops up, you will be able to create a more natural looking image with proper color balance.

An important note here is that some images will be naturally dark and naturally light. Just like back in the “old days” when we’d take pictures with a roll of film, sometimes they were over or under exposed. In that case, there is only so much editing you can do with a photo program to get the best image.

Here is the finished processed image. This is the processed version of the cell phone picture taken above. More work could be done on adjusting the white balance and so on, but this gives you a good idea of how the process looks from beginning to end.

Once you have a finished image you are happy with, you can save it as a new file as a TIF or a JPG—whichever you prefer for your use. I always keep an edited TIF on hand and use a JPG for posting online or sharing via email since the file size is so much smaller.

I hope that this brief walkthrough helps give you some pointers on digitizing your glass negatives!

JOIN THE RESEARCH ARSENAL COMMUNITY TODAY.