The Importance of a Well-Documented Private Collection: Part 3
The last two weeks we’ve discussed the importance of a well-documented private collection, and this week we’re going to dive into some ways to keep all of that information with your items. Although this “can” be done with paper, pencil and a filing cabinet, I strongly recommend you go the digital route. I know we all love our historic things, but record-keeping should definitely be in a 21st century style.
Excel (or Google Sheets)
This is probably the simplest way to do this. Create an Excel sheet with fields for the item, purchase date, cost, and purchase information. I would also recommend including where you are keeping the item if possible, so that it is easy to locate if you have a large number of items. Here is an example of what that might look like:
Here is a very simplistic catalog record using Excel. While it does track some information, as you can see, it is very limited.
While this technically works on a basic level, do you notice any issues with it? For example, how descriptive can I be about the item in that short Excel line? Would it be easier to have a photograph of the item tied in with this information? Especially when you have several tintypes of Union cavalry soldiers with carbines? This brings me to my second option.
Use a Program like CatalogIt or ReCollector
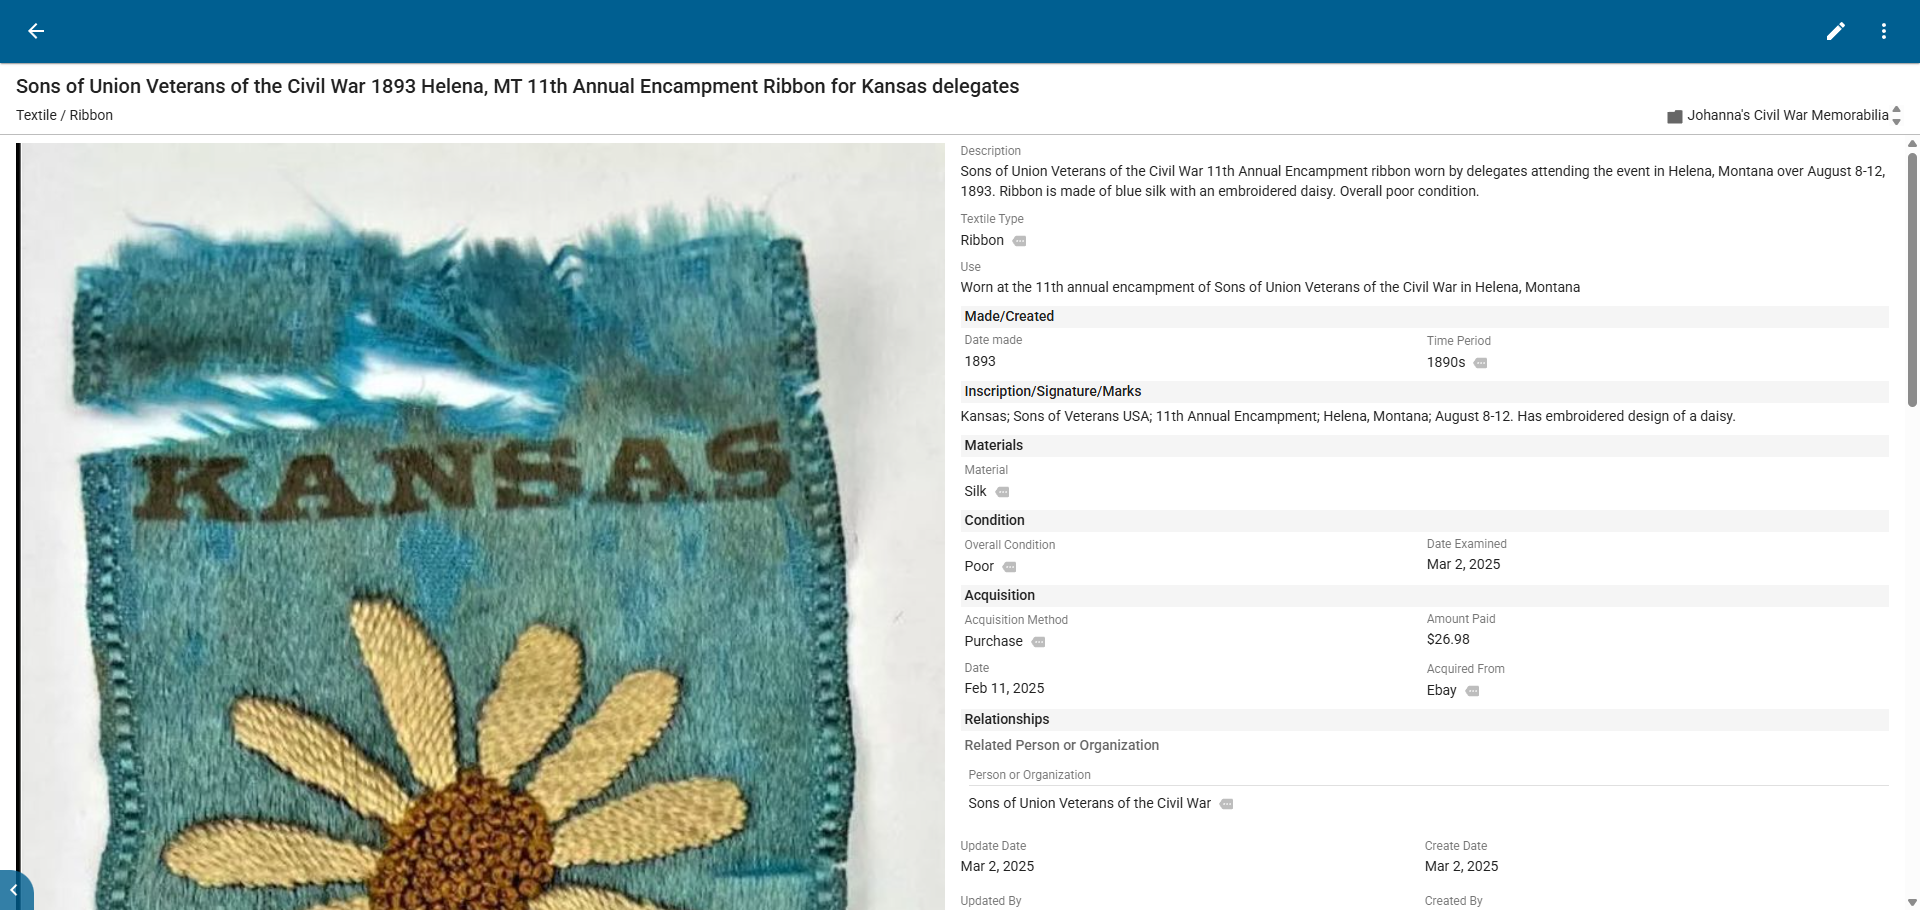
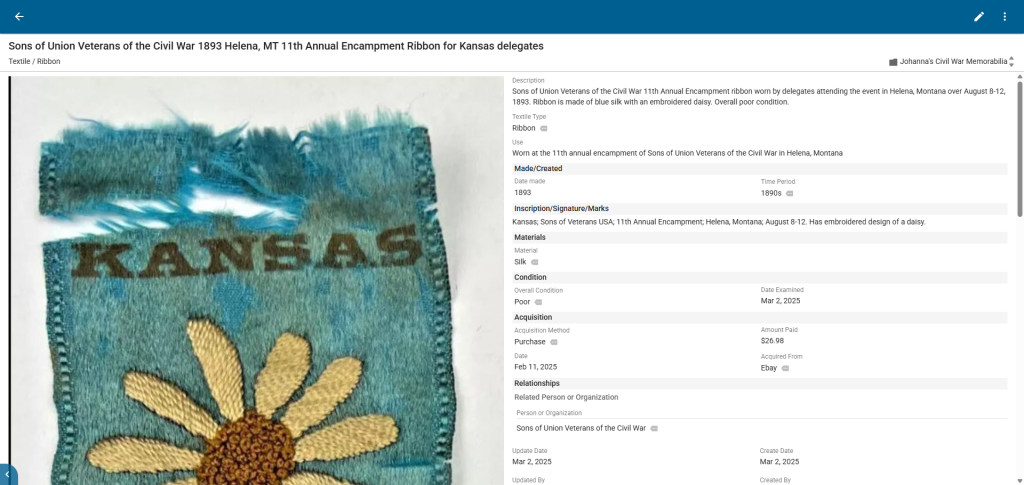
There are programs designed for this sort of thing, and I have featured them both in the past. Both CatalogIt and ReCollector allow you the space to input all of the information above, and then some. Here is an example of a catalog record using the CatalogIt software. Notice all of the information that this software tracks for each item.
Here is a screenshot of a catalog record using CatalogIt software. Can you see the vast difference between this and Excel? Which one is better suited for supporting a well-documented private collection?
This photo shows you what it looks like on the backend for inputting information and what sorts of fields of information it tracks.
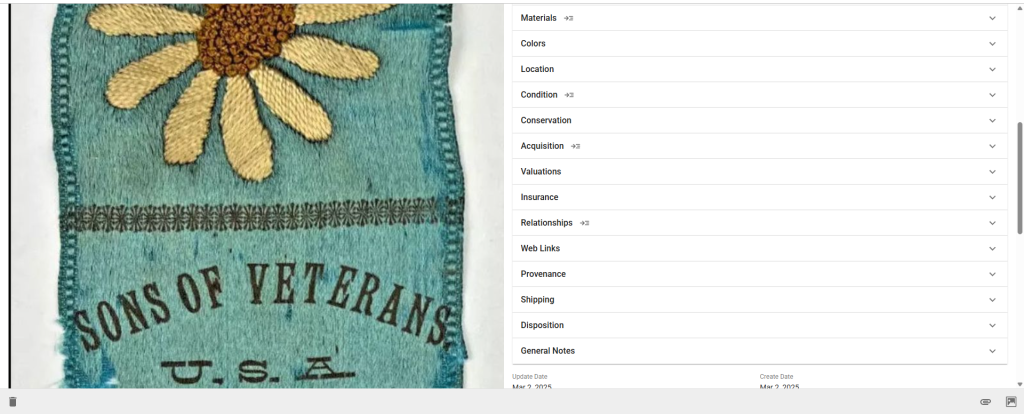
This is a screenshot showing just some of the categories available to input data for collection items using CatalogIt. Each of these expands with multiple fields of information available. They do not have to be filled out, but the more information the better.
This may look like a lot or seem intimidating, but it really isn’t tough at all. Once you create your first catalog record, it starts to move very quickly. Plus, you can always go back and add more information.
Pros and Cons
Obviously, going the Excel route is simple and something that most folks are already familiar with. However, it is extremely limited and would be cumbersome to use to add a large amount of information to. Whereas CatalogIt is new software so it does have a learning curve, but the value in the type of information it can track far outweighs that learning curve. And if the amount of options for information to be added on CatalogIt seems overwhelming, you do not have to fill in each available box, but the space is there for you to if you want to. Both give you search functionality which far outweighs the “historic” paper and filing cabinet method.
As we discussed in the beginning, the point of this is to keep track of all of your collection information. It’s far too much information to just be rattling around in your head. It needs to be written down, and it should be done in a way that you can actually put everything down that you need to. On top of that, it should be done in a format that the information can easily be passed on to others or accessed by others in the event that your family or loved ones are trying to figure out your collection for resale purposes. In addition, should you decide to donate your collection, this will offer the museum a whole wealth of information on your collection so that they are not starting from scratch. Having worked in museums for nearly two decades, you would be surprised at the amount of information that can be lost when an item is donated by someone who doesn’t really know what it was. This kind of information is absolutely crucial. Remember, context is everything and this is how we keep the context with our collection.
Now that we’ve reached the end of this series, what will you do? Do you already have a system in place that tracks all of this information? Will you start one?
The Importance of a Well-Documented Private Collection: Part 1
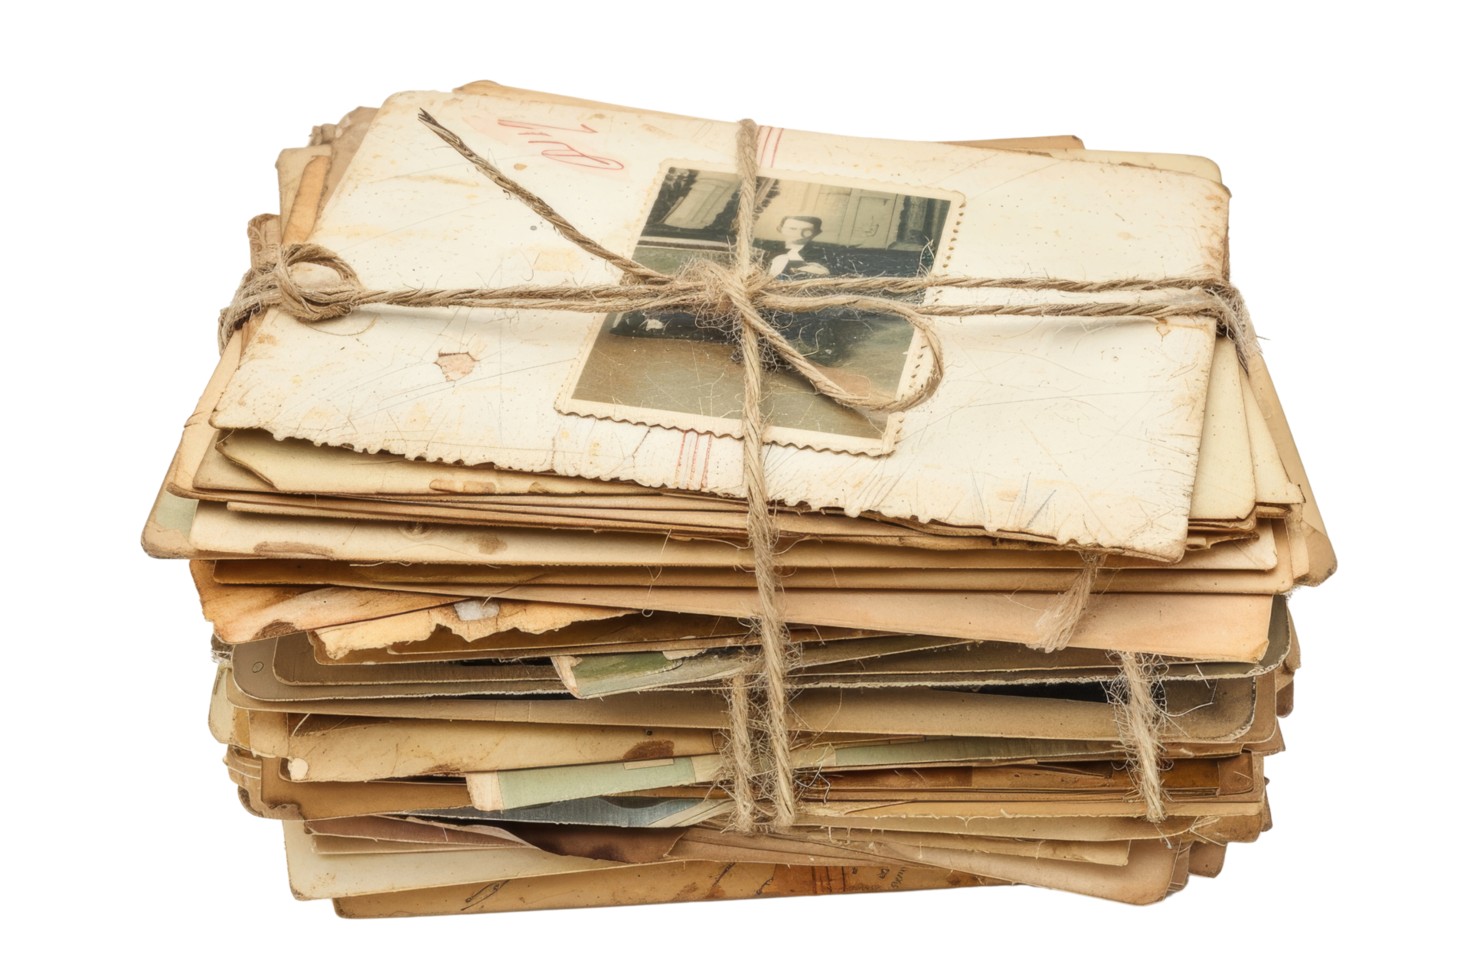
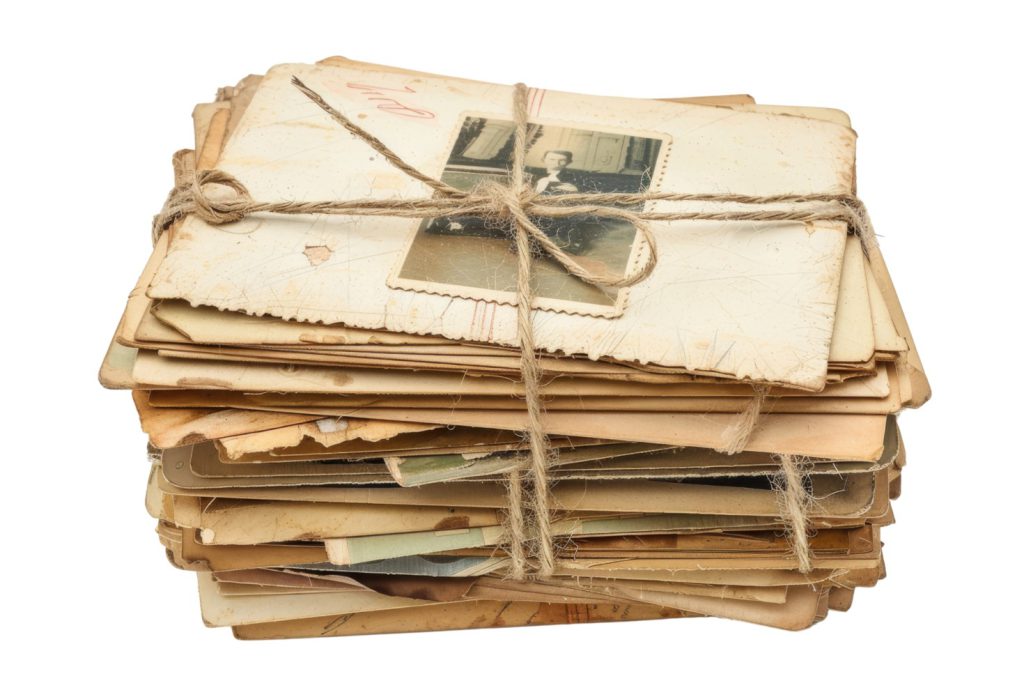
The bundle of old photos is a great example of a pile of history that has lost its context. Without the information of who these people were, this stack of at one time significant memories, becomes nearly worthless as it is reduced to just photographs. A well-documented collection can help prevent that.
I have discussed the importance of cataloging your collection over the course of a few blog posts in the past, and today I want to highlight the importance of having a well-documented private collection.
As collectors, we often know our collections inside and out—where and when we got something, who we got it from, what we paid for it, the significance of it, why we got it, etc. But what we often don’t take into account, is that there may come a day when we can’t remember that information. And there also will come a day when we’re gone from this earth, and unless we’ve written that information down somewhere, it dies with us.
How many of you have come across an old CDV and written on the back is “mother”? Who’s mother? What was her name? That information is just plain gone. Sift through the box of vintage photos at your local antique store and you’ll find pictures like that in droves, or the ones that are just blank on the back. They often sell for only a few dollars each because the context of who these people were is totally gone. That context gave them their value. Without it, they just become random old photographs. Just for fun, I went to eBay and entered the search term “unidentified photo” and got 220,000+ results. I then input “identified photo” and got only 6,100+. Clearly, there is a problem with people losing the identifying information over time.
The same is true with objects. How often do you see the words “ID’d” or “named collection” with items in an auction listing? That always drives up the price, doesn’t it? It does, because the names add value. Now you know who this belonged to and the items take on additional meanings. Without it, they are reduced to nothing more than the physical object itself—a Model 1850 foot officer’s sword, haversack, etc.
At one time for all of these objects, they had identities. There was someone alive who knew all those people in those unlabeled photographs, and someone who knew who owned that sword and that haversack. Unfortunately, that information did not travel with the object that outlived them. This is where we as collectors need to keep information whenever it is available.
Since this is the start of a new year, it’s a good time to start keeping track of your collection information if you are not already. This month, I’ll be writing blog posts on what to keep and why, as well as the best ways to keep it.
Step 1: Collection Assessment Project
Take a look at your private collection and just broadly assess if you’ve kept any of the following: purchase info (date of purchase, from whom, for how much, etc.), any research documentation (did you look things up on your phone without saving links or copying information down anywhere?), storage location (do you know where all your items are and how they are stored?), and lastly, condition (do you know the condition of your collection items and which ones are damaged and needing conservation, or better storage?).
And one last thing, how easily were you able to find this information? Was it at your fingertips with a few keystrokes on the computer, or did you have to go digging through boxes or files? And how easily would your partner or loved ones be able to find all of this information if you weren’t there?
This is all just some food for thought as you go through and assess your private collection. But we’ll use this information as we discuss ways to begin to keep track of it all and organize it. Check back next week for the next blog (step) in this series.
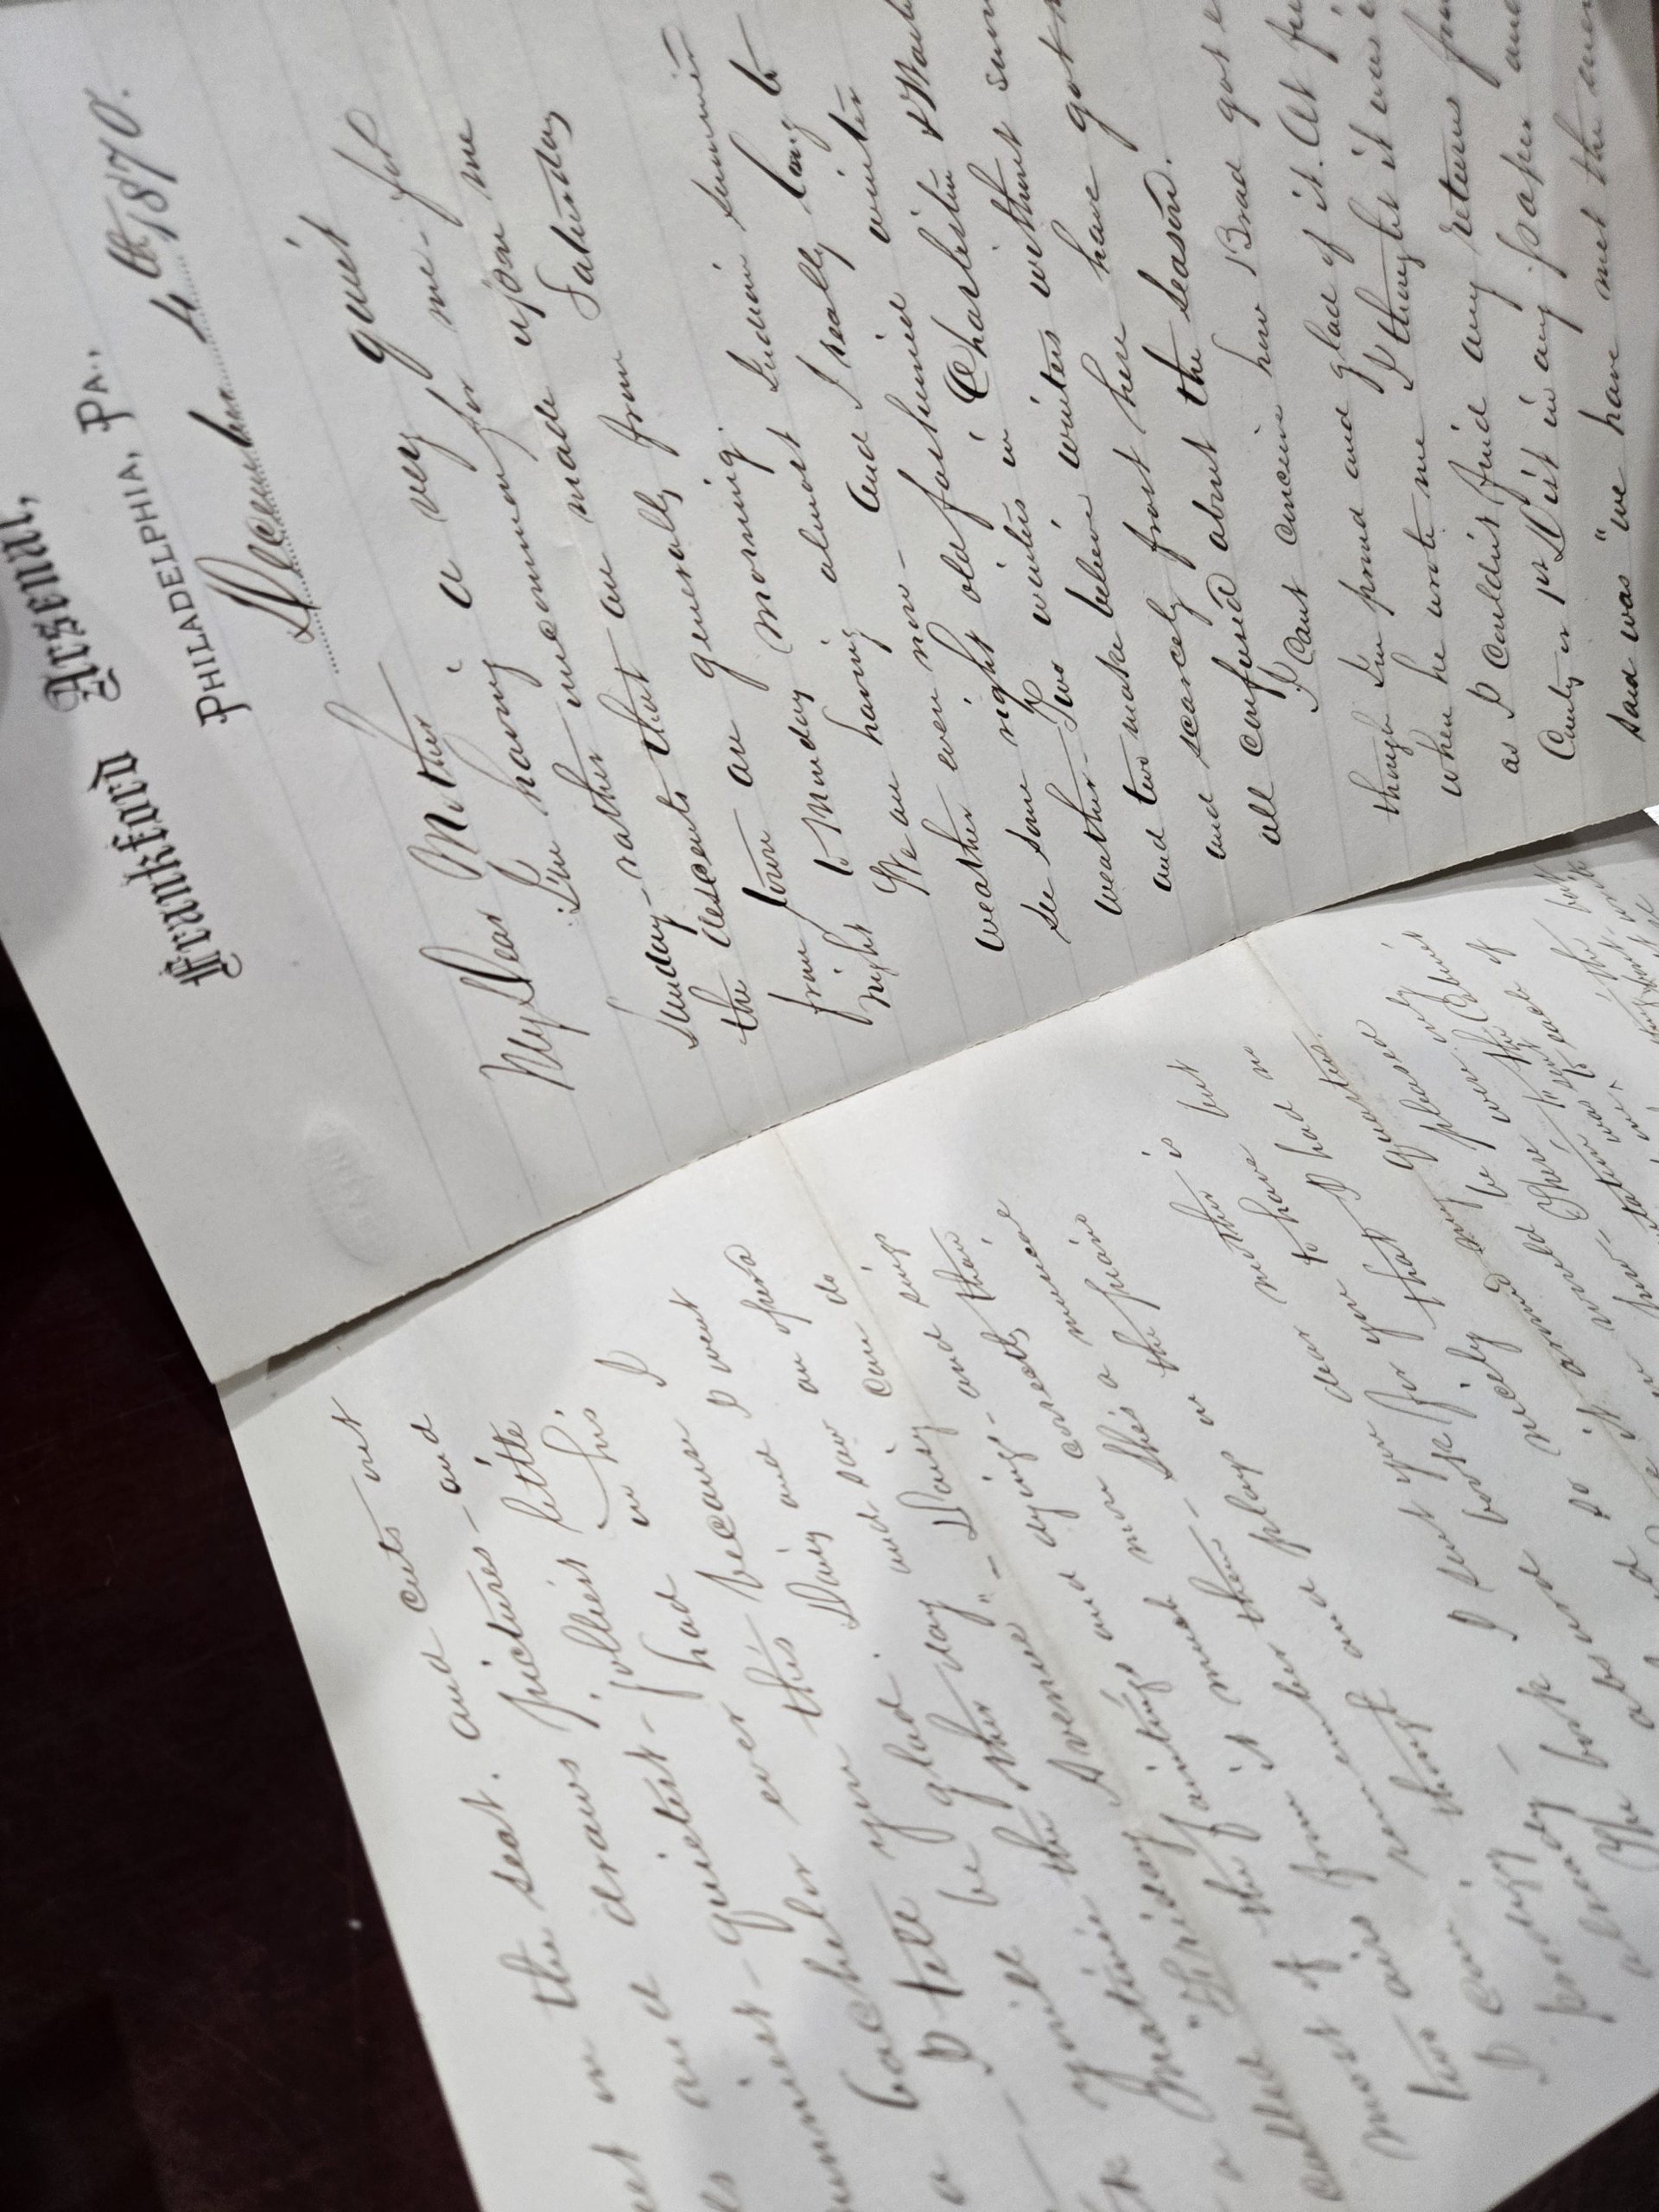
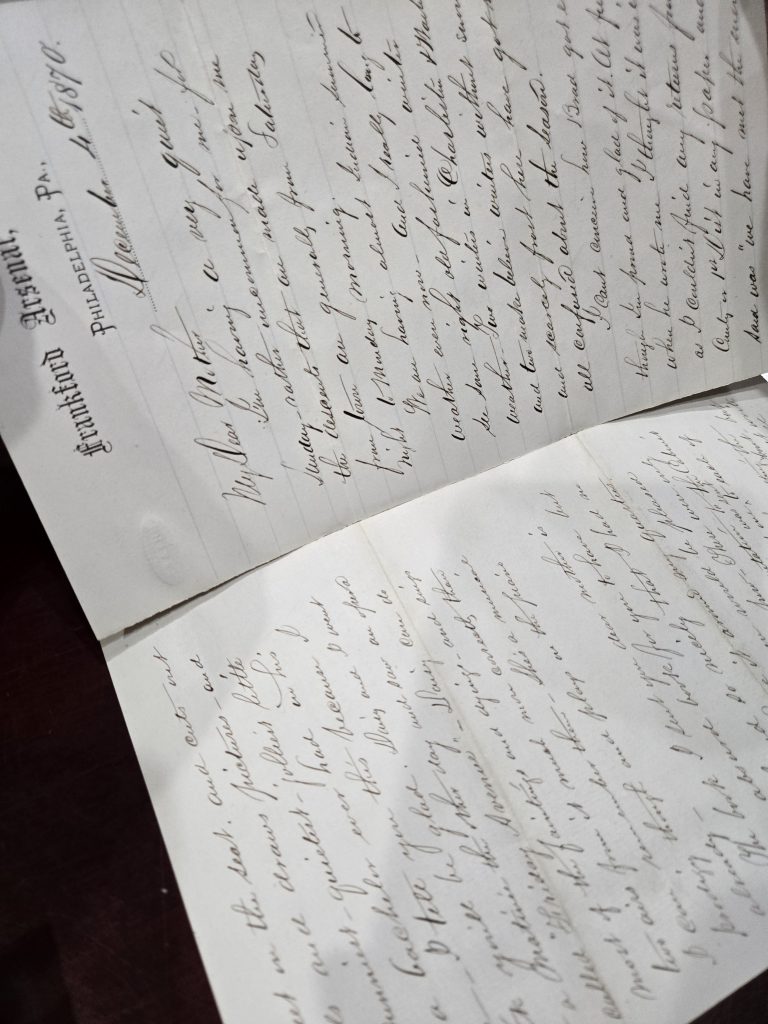
Notice how this soldier’s letter has torn along the crease where it was originally folded over 150 years ago. Storing it flat and unfolded could have prevented the additional strain on the crease that caused that damage. Knowing the best way to store historical documents can make a tremendous difference in the life of a collection.
This week while scanning some Civil War letters I ran across damage that I’ve seen all too often with old documents that have been folded. The original crease of the letter had become brittle and damaged over time to the point that it had torn nearly the entire length except for a short 2-inch section. This is something that tends to happen when documents are stored folded. It’s not necessarily from poor handling (although that certainly plays a role) it can happen just from being stored improperly. Here are a few tips on how to store historical documents that you can use in your archive to avoid similar damage.
Store Historical Documents Flat
This is a simple thing to do and it makes a huge difference in the care of documents. At first, it might seem strange to take a letter that has been folded in half for 160 years and store it unfolded. But the reason behind it is simple: the paper was produced in a flat sheet and that is position that puts the least amount of stress on it. Creases over time become tears because the crease is putting a large amount of stress on the paper fibers—eventually weakening them to the point of tearing. If you’ve ever wanted to tear a straight line on a sheet of paper, what’s the first thing you do to it? Make a crease where you want the tear to be. Doing that first weakens the paper so that when you apply stress to it, the tear will follow the crease. The same principle applies here even though you are not intentionally applying stress to the paper to tear it.
Store Historical Documents in Sleeves
This is something I’ve mentioned in previous archive posts, but I strongly recommend storing historical documents in protective sleeves. The sleeves themselves provide another layer of strength to the fragile period paper which helps prevent damage. In addition, storing a document flat in a sleeve allows both sides of the paper to be completely visible without folding/unfolding, and the sleeve protects the document from hand oils, dirt, dust, etc.
If sleeves are not viable for your collection, I would recommend using archival paper as interleaves between the historic documents. This will provide a buffer between one paper and the next, which offers some protection.
Store Historical Documents in Archival Boxes
Storing documents flat produces the least amount of stress on the papers themselves. Once the papers have been sleeved, you can place them in archival folders and those folders should fit neatly into the box. I understand that boxing everything may not be practicable for everyone, and the alternative would be to store them vertically in filing cabinets. This is something that is accepted and done by many major archives, and can be very efficient.
If you have oversized documents such as muster rolls, ledger books, newspapers, etc., I would strongly recommend storing those flat in appropriately sized boxes. If the oversized loose papers are pliable and strong enough to be rolled, they may be stored rolled using an archival tube and rolling the papers around the tube and storing them in a second tube or wrapped in archival tissue and then polyester film. This ensures that the document is not rolled too tightly causing damage.
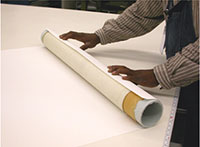
Here you can see staff at the National Archives rolling a historic document around a tube which will then be wrapped in archival tissue and polyester film to be protected.
No archive is perfect, and when you are working with old and fragile items, unfortunately, some deterioration is unavoidable as the very materials simply age. But, the more steps we can take to better care for our collections, the longer they will last. For other archival tips, check out previous blog posts here: https://researcharsenal.com/category/archival-and-preservation-tips/
Collection Preservation Tips from The National WWII Museum
This photograph from the National WWII Museum shows collections boxes stored on Space Saver shelving, in archival boxes, and properly tagged with archival tags. Notice the staff member is also handling the poster with gloves while is fully supported so that it doesn’t bend and tear. Image source: https://www.nationalww2museum.org/war/articles/20-years-collecting-wwii-artifacts
Although the National WWII Museum is a bit further forward in time than Civil War collectors, the concept of preserving uniforms, firearms, photographs, and paper, is much the same. Their website is a fantastic resource for the private collector, so I thought it would be helpful to distill some of their key collection preservation tips down for Civil War collectors.
The National WWII Museum champions the principle “Do No Harm”, offering clear, practical guidance to help preserve such treasures for future generations. You’ll recognize the “Do no harm” motto as something I have repeated in previous posts—do not do anything to your collection that is not reversible! Put down those ballpoint pens! (If you know, you know…)
Seven Factors That Can Affect Your Collection
Before diving into specific techniques, here are seven factors that can affect your collection that you should be aware of:
Light: UV-rich sunlight and fluorescent lighting can severely damage paper, textiles, photographs, and furniture. Keep sensitive items out of direct exposure.
Temperature: Extreme or fluctuating temperatures wreak havoc on materials like rubber, wood, and metal. Avoid attics, basements, and unconditioned spaces.
Humidity: Too much moisture fosters mold and pests; too little causes brittleness. Aim to maintain 45–55% relative humidity in stable environments.
Pests: Insects like silverfish (paper), moths (textiles), and termites (wood) can be destructive. Regular inspections are essential.
Human Handling: Oils, sweat, or makeup from hands—even gentle touching—can harm surfaces. Always use cotton or nylon gloves and avoid unnecessary handling.
Chemical Reactions & Pollutants: Metals and marble can corrode when exposed to indoor airborne chemicals; avoid the use of acid-emitting materials.
Inherent Vice: Some materials naturally degrade due to incompatible components—such as leather glued to wood. Periodic condition checks help catch early signs.
Tailored Preservation Tips by Material
Textiles
Store in climate-controlled spaces, not attics or basements.
Keep out of bright light and UV exposure.
Use acid-free boxes—avoid ordinary cardboard or wooden drawers. Wood will off-gas over time and that can discolor and damage your collection.
Store flat when possible; pad and support folds if necessary.
Use acid-free tissue padding, properly padded hangers, or roll large textiles around acid-free tubes—never sealed plastic bags. If moisture is sealed inside a plastic bag with your textile, it can cause mold.
Paper
Maintain storage below 72°F and around 50–55% humidity. This may seem like a high level of humidity, but very dry air can be as destructive as very humid air, just for different reasons. This level of humidity will keep the paper from becoming brittle and crumbling.
Keep flat, avoid folds, and use acid-free folders/boxes/sleeves.
Frame with archival-quality, acid-free materials and UV protective glass.
Photographs
Store in a cool, dry place, use acid-free or inert framing materials.
Handle by the edges, ideally with gloves—avoid touching surfaces.
No tape, markers, paper clips, or sticky notes; use pencil on copies or backs.
Avoid self-adhesive photo albums at all costs. I know those were very popular in the 1980s and 1990s, but they are bad news for the longevity of your collection! Opt for acid-free sleeves or place them with archival photo corners in archival photo albums.
Be sure to rotate any original images when displayed, or better yet, consider displaying copies, leaving originals safely stored.
Metal Artifacts
Most metals (except gold) are prone to corrosion—store in dry, conditioned spaces.
Don’t polish or clean without professional consultation. Cleaning and polishing old metal ruins the aged patina on the item, which can also be an issue when determining authenticity of a piece.
Always wear gloves when handling. Oil from your fingers will damage the original polish on a sword or other fine steel.
Light oil (e.g., 3-in-One) or wax (e.g., paste wax) may help preserve steel or iron—but consult a specialist for weapons.
Leather
Store in moderate humidity and temperature, away from direct light.
If dirty, gently clean with damp cotton cloths. Please avoid saddle soap or conditioners as they can discolor and damage historic leather.
Never apply petroleum products; they can cause irreversible damage.
Use acid-free stuffing to maintain form—support shoes, boots, cases thoughtfully. If you have an old saddle, for example, make sure that it is fully supported on a saddle stand. If it’s sitting on a shelf, that puts the weight on parts of the saddle that are not designed to carry it, causing damage. That can also cause excessive strain on stirrups and other components. The dryer and more brittle the leather, the more of a concern this is as leather tends to stiffen over time.
Suede and kid leather are different, and should be treated by a specialist.
Wood
Wood objects are fairly stable if kept in consistent, moderate environments.
Avoid direct sunlight, over-cleaning, or using linseed/oil-based products.
Wax like SC Johnson Paste Wax may offer a protective layer; oil sparingly, especially around handles or grips.
When oiling your firearms, make sure not to get that oil onto the grips or stocks.
Expert Resources & Support
If you require a professional opinion, or are just looking for more information, these are some great resources:
American Institute for Conservation — to find recognized conservators.
Library of Congress — guidance on paper and photo care.
Northeast Document Conservation Center — specializes in paper/photo conservation.
Sometimes following museum best practices with your collection can seem overwhelming. Here are 3 simple tips to protect your archival collection that you can do quickly, easily, and affordably.
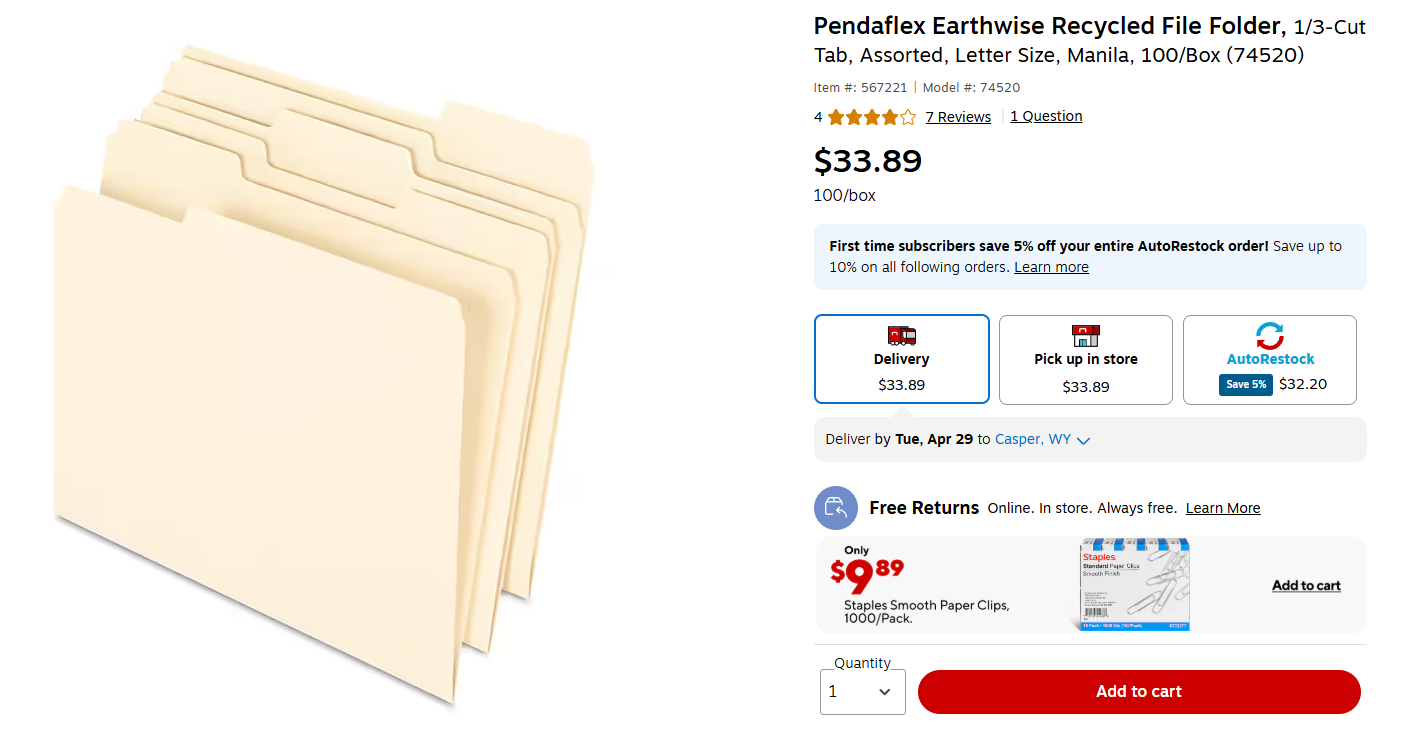
Use Archival Folders
These Pendaflex folders from Staples are acid-free and would be an easy option for archival storage. They can be found here.
If you’ve gotten into collecting Civil War history, you’re likely to start winding up with a lot of paper. This ephemera could be CDVs, military documents, old newspaper articles, etc. Some of these may end up on display somewhere in your home, but if they are not, they need to be stored. It may be tempting to just stick them in a box for safekeeping, but that is not the best idea.
Placing these historic documents in archival folders is a great cost-effective option because it allows you to protect the documents while also keeping them organized. Archival folders are becoming much easier to find nowadays. Instead of ordering them from museum supply companies, you can often find them at your local Walmart or Staples store. They tend to cost a bit more, but in the long run they are worth it. Non-archival materials will damage your documents over time. They tend to be acidic, which means they will turn papers yellow and eventually crumble them away.
We’ve all seen an old, yellow crumbly newspaper, right? The reason that the newspaper is yellow and crumbly is because it was printed on very acidic paper. Dime store paperbacks from the 1950s and 1960s are often yellowed as well for the same reason. Acidic paper is cheaper and is often used by printers when longevity is not a priority. Now, have you seen a paper turn yellow because it was stored next to a newspaper? I’ve seen this happen countless times in shoe boxes of old papers that folks tend to keep. The newspaper clippings are acidic and so any paper they come into contact with is also yellowed and damaged. That is exactly why we want to use archival folders to store our documents. We don’t want them to turn yellow because they were stored inside an acidic folder.
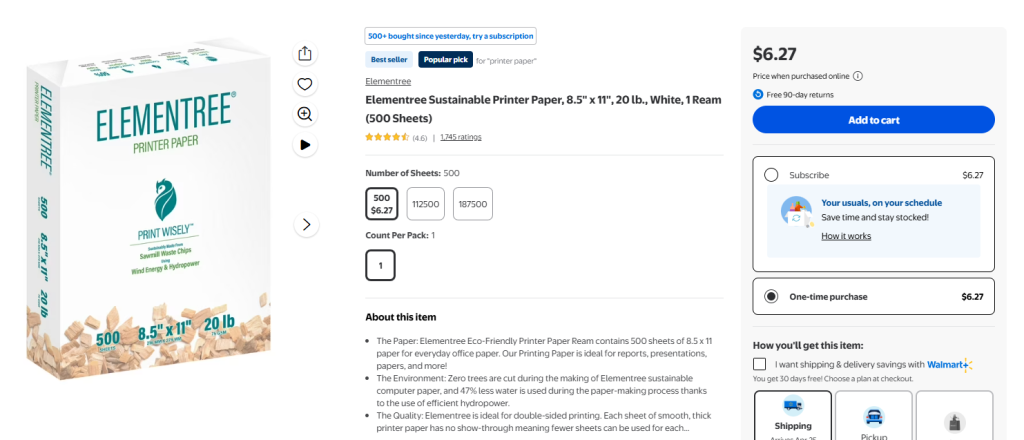
Use Acid Free Paper
This paper is extremely low cost and available locally in Walmart stores. It is acid free and suitable for archival purposes. This paper is a great low cost option for interleaving. It can be found here.
Now that you’ve got some archival folders, you’ll want to get a ream or two of acid free paper. You can store multiple documents in the same folder, but you’ll want to separate them with acid free paper. Use the paper as interleaving between the documents.
Let’s say you have 5 papers that all relate to the same individual and you would like to store them in a folder together. You can store the first document in the folder, then a sheet of acid free paper, the next document, a sheet of acid free paper, and so on, until you’ve placed them all in the folder. This ensures that the papers are not rubbing against each other and transferring ink or dirt, and they are also protected from any potential acid transfer. Now, this is something that you will need to check on. If you have a folder full of newspaper articles, that acid in those newspapers may leach through the interleaving eventually, so you may need to replace it periodically.
Acid free paper can also often be found locally very easily at any office store or big box store.
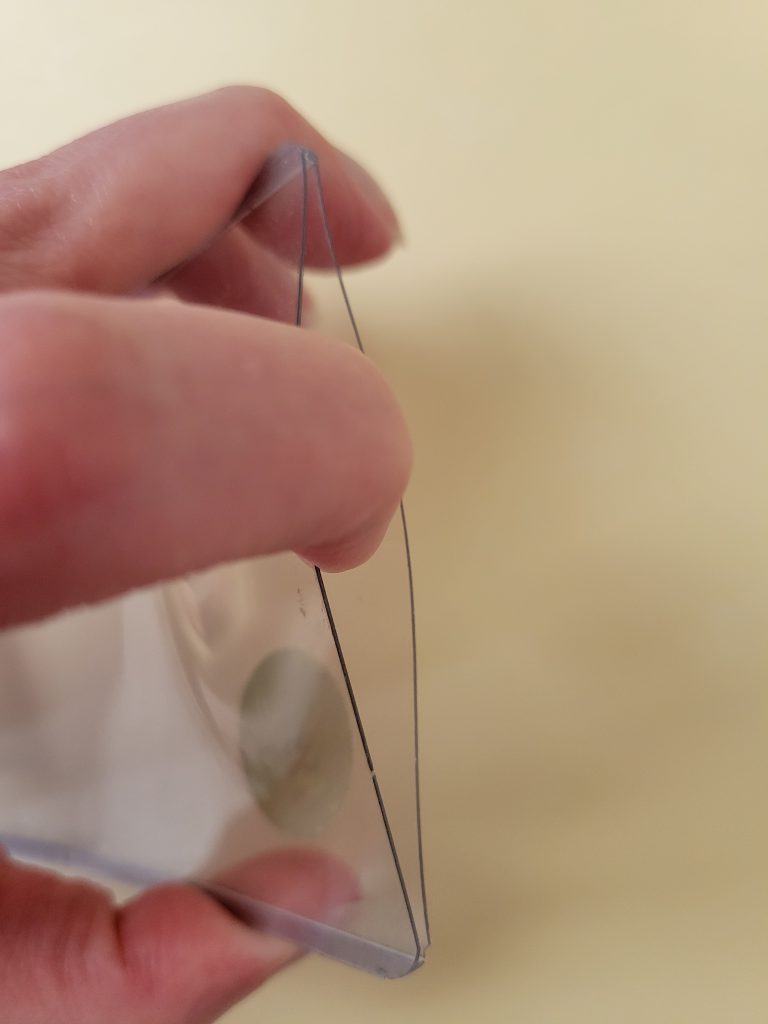
Use Archival Photo Sleeves
These are archival products that I really can’t live without. I use these for photos and also for any important documents. These sleeves give paper artifacts and an extra layer of protection. For reference, I prefer the side-locking sleeves that I’ve mentioned in previous posts, which can be purchased here.
Here is an example of one of those hard plastic sleeves. Notice how this is only a narrow opening available to slide media in and out and how it takes a great deal of pressure to open. Compare that to a sleeve that lays completely flat, opens up for your to place your document inside and then folds back over. These may have value for dealers who have people sifting and sorting through their wares on a regular basis, but these have no place in a private collection for long term storage of fragile documents.
I have had CDVs shipped to me in rigid plastic folders that I CANNOT STAND. I’ve also seen a lot of collectors keep their CDVs in these same hard plastic holders that are only open on the top. I hate these for several reasons:
You have no idea if they are archival or not. Just because an antique dealer shipped you a photo in it, does not imply that it is safe to continue to store your item in it.
They are rigid and the document is held inside by force. This is not a good way to store archives. You don’t want pressure on the document because that harms it over time. Think of any video you have ever seen of an archive or museum collections room—are ANY of the artifacts stored in things that squish them, press down hard on them, or force them in any way? No.
Because they are so rigid and only open on one side, it is much more difficult to remove the document from them and also difficult to place them back inside. Yes, we all have our little tricks to pop them open a certain way, use a thumb to press down and slide them out, etc. Again, where have you ever seen anything like that done in a museum collection? It’s not. Typically, these cards are used to store CDVs, although I have seen them used with tintypes, which is a whole other issue…CDVs are basically REALLY old cardstock with an image printed on it. It should be handled delicately because each time you remove it and put it back, you are damaging it. Period. No matter how good you think you are at getting them in and out. The very fact that you have to grab the image with your thumb to pull it out, damaging it. Period images should be handled by the edges just like how you’d handle an “old fashioned” CD. Remember how sacrilege it was to get fingerprints on a CD? Think of that when you’re handling those CDVs and tintypes. You can’t handle them by the edges and use those rigid plastic holders that are only open on the top. For that reason alone, they are not good for these collections. Not to mention rubbing on the images, damaging the prints, etc.
If some of you would like to keep your images in “pockets” I would recommend looking into archival sleeves that are designed to hold images safely in binders, or even small archival books designed to hold images. I use these notebooks, place the images on the paper using archival photo corners, and they are safe inside the book without any pressure on them, and they can easily be removed if I need to rescan them for any reason.
Bonus Tip
Always, always, always scan and digitize your collection! If you don’t have one, invest in a simple scanner that can scan at least 600 dpi and scan all your photographs at that resolution to start. Documents can be scanned at 300 dpi and be easily read and enlarged clearly. Once you have your collection digitized there is no reason to be pulling old photos in and out of sleeves, documents in and out of folders, etc. You can easily look at them digitally and ensure that their condition is not degrading as you keep handling them. No matter how careful you are, every time a document is handled, its condition degrades. That’s a simple archival fact. So, the more we can minimize that, the better! And as an extra tip, please consider setting up a digital catalog system like I discussed in a blog post a few weeks ago here! All of these tips will go a long way to protect your archival collection!